Thursday, July 28, 2011

Absentee-ism

I seem to have been absent a lot lately. I have actually been in and out of hospital with various surgeries/biopsies both of my own and family members.
Mum has been in Niagara (where there is a severe C Difficile problem) for just over a month. She should be home tomorrow. Maisie has had umbilical surgery to repair a hernia. That was a day procedure. Holy Hanna! how the little ones bounce back!
I am back in tomorrow for a more serious procedure that will keep me in for a couple of days. They really try not to keep you in for long anymore. This is more preventative than anything else. The cancerous changes so far have been contained. I will be quite nervous until the pathology is back though.

In the meantime I have been making a lot of kid's hats and adult fascinators. Hopefuly I can get some pictures on here once I get back.
Til then...

Wednesday, July 13, 2011

Another attempt


I tried free motion quilting before (not terribly successfully) and then did a lot of free motion embroidery recently. Then I found this blog ww.dontlooknow.typepad.com and HAD to try her pillow tutorial.

My result is above, which has my first attempt at free motion quilting. I have done embroidery but not quilting. I was quite rusty with the embroidery as well but it came back (to my not amazing previous level) by the time the pillow cover was done.

Thanks for the comments on the picture of me in my new dress. I have worn it often since then.

Sunday, July 3, 2011

Dress


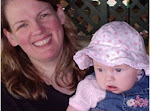
Maisie and I with friend Barb at my son's grade 8 graduation.
This was the only year both of my children will be in the same school. By the time she starts highschool, he will have finished university.
I thought the ceremony was on Wednesday eve, but it was actually Tuesday so I had to miss the last class of my textile arts course. It was a frenzy trying to alter his trousers and get my dress finished. The skirt was from an outfit I made for a wedding a few years ago. It was kind of big and droppy as the skirt so I wore a black one. I cut an empire top and added the skirt to it but the hem hung longer at the back than front. Once I saw all the asymmetrical hemlines in fashion now I remembered the dress, pulled it out and finished it off just in time.

Tuesday, June 21, 2011

More Embroidery


Layers of silk, organza and thread have gone from a swirly sky,


to this,and eventually to this.


I am going to add some beads as stamens in the centre poppy and stop. It has to be done at some point. Now I need to figure out how to finish it. This one is for my Mum, who just got out of some major surgery about an hour ago. All is well so far.

Friday, June 17, 2011

Hat Head part 2


These photos have been taken on the hat forms that are shown in the last post.
I am mainly a garment sewer so I thought I would combine the two things. I free handed the vine and flower design then added a bead in teh centre of each flower. I thought it would be for me and I wanted subtle, but I don't wear a lot of beige or cream in the summer. Oops. Maybe I will try and black and white one. It might be easier if I do it before the hat is halfway constructed like these ones were.
This one has leaves that I made by cutting then singing the edges. I stitched them on a half completed hat and added a flower pin I had made. Voila! a perfect summer sunhat that can match any outfit. Maisie loves it!
These are for you Irene! I combined the stitching with a garment. A hat is a garment, isn't it?
Soon I will try to show myself in something I have made. Thanks Ruthie, Irene, Ann and Karen for your support.

Thursday, June 16, 2011

Hat Head

I did a bit more on trees and stuck it in a frame (loosely) for this pic. I might paint the sky a pale gray blue instead of white but am holding off to ruminate a while.

These are some hatforms I drew in free motion. I did about 7 of them but only a few are shown here. I have been painting them, then embroidering and embellishing them some more. Here are two in progress. The flesh was painted first, then the hat, then background. On the red hat the blue leaked onto the flesh. I had to run with it. I added a bit more flesh tone on her nose, but left the blue everywhere else.
Some more stitching and painting. I stitched in one leave on the side and tried to stamp two more but did not like the effect.

So I appliqued some silk leaves over top and added copper foil to them. I then added some gold and copper foils to the swirls on the left. I might add more. Taking a break on it for now.

This one reminds me of Nefertiti. You can see above I am adding some diagonal designs to try to mimic the hat in the sculpture. Not sure about it. Never sure though.

Wednesday, June 15, 2011

Free Motion

I have always wanted to learn free motion embroidery. What I do is so tight and controlled and I wanted to loosen up. I have been taking a course in Textile Art at a local college and so have been doing a lot of free motion work lately.
I love it!
The trees are about 9x9" and aren't quite done yet. I roughly stitched in the scene, then loosely painted in the bushes, leaves and ground. The bushes and leaves were done with a technique using tiny snippets of silk held down with tulle. The foreground was stitched back and forth with shades of green. It wasn't until I added some deep green into the front that the depth was really created.
This one has more applique. I drew the design on the top and stithched it. I planned to use the reverse side as the right side but decided I wanted to elephant to face right, so I had to add the silk, stitch from the back and cut away the rest once it was all stitched. I am still playing with it. It probably should have been done with black bobbin thread as the white really shows. I want to paint the background and add more stitching and maybe some gold leaf.
I gave up trying to use my Husqvarna Mega Quilter,(which I LOVE for other things) and am using my Pfaff 1550. I had to buy a foot, but I have less tension problems than before.

Friday, March 25, 2011

Musings

Lately, and by that I mean about two years, I have been sewing a lot of simple things. Smaller things like hats, scarves and other accessories as well as children's items, some pillows, curtains, aprons, purses.
I haven't had a lot of extra time, but that is not the main reason. I am big and not happy about it. It is hard to dress a body you are not happy with. Nothing looks flattering to my eyes. However, none of my older clothes are going to look flattering to anyone else either. Really, it shouldn't matter. No one cares what I wear. I am not a celebrity or public figure. I really admire women like Carolyn and Angie, who are larger than your average model, but dress to please themselves. They are well dressed and I am not. I really need to look to them as examples. I don't have to be happy with my weight, but I really should tart up this old body to look the best it can now while working on that aspect.

Friday, March 4, 2011

Teach Yourself to Sew: How to Sew a Bias-strip Scarf - Threads

Teach Yourself to Sew: How to Sew a Bias-strip Scarf - Threads

Oops

OK, sorry about that last post. I was interupted while I tried to write it.

I love scarves. I especially love scarves that are a little bit different, a little bit extra. The ones that call to me are usually textured, but soft and almost always very colourful.
The technique of encasing fabric and stitching over water soluble film has been covered at Threads Magazine in the post above.
This one was one of my first from a few years ago. I gave it to a weaver from the Artist Educator course I took last year. She gasped when she saw it so I knew she really appreciated it.

I usually do bias strips either close together (below) or a little more open (above) and add ribbons and yarns into the mix. Lately I have been experimenting with shapes and more free hand embroidery and the scarf with blue swirls and the green one with pink roses (two posts below now)are the result.
This is a recent scarf with silk bias strips, yarn and organza ribbon. It is dense but very soft.

Lace Scarves


Made using silk, yarns, soluble stabilizer and LOTS of thread!

Wednesday, February 23, 2011

Oliver and S


This is a cute little top made with an Oliver and S pattern called 2+2 in a gorgeous Kaffe Fassett print cotton from Hyggeligt Fabrics , which is a fabric store here in town. There was a sample in the store and Maisie insisted on buying the ingredients so I could make her one EXACTLY THE SAME! She rarely asks me to make her anything so I obliged. I like the top, but the construction was a bit odd. I didn't love the rectangular patch that covers up some funky cutting/gathering going on. Maybe it was just because it was my first attempt.

I made my own pattern from my blocks in a similar style. I made a fully faced yoke across the front and could not resist adding a cuffed sleeve with gathering at the sleeve band. I had this fairy print cotton and a co-ordinating polka dot so I made it up as a dress. I also piped in with a mini-pom pom piping I had. She wanted the pink ribbon bow at the centre front yoke seam (but I don't like it, shhh).
The cuffed sleeves use a method in a book I have had forever. I will find it and post the name. I think it is "The Busy Mother's Guide to Sewing Children's Clothes". There are a lot of tips in it, but I still think I am too busy for many of them.
This is the start of the second top version. This one is my pattern and is in a toile with gingham trim. I think I used the Oliver and S capped sleeve though.
Little clothes give such immediate gratification that I cannot reisist doing some once in a while.
They finish so much faster than the embroidered beasts I usually work on!

Friday, February 18, 2011

Back

Thanks Irene. I need a bit more time to decide, but am leaning that way too.
The jacket back. This went a LOT quicker than the other pieces. It gets a lot speedier with some practice.
I tried to photograph the sketch but it wouldn't come out right.

Wednesday, February 16, 2011

The Right Front

Tearaway stabilizer on back with stitching done.On the positive applique I stitched just inside the lines, on the negative applique I stitched just outside. This way the finished lines are close to the original design lines once the fabrics are cut away.
Closer up picture of the fronts.
This is the original front on the left (on the right when viewing here) with a new right (on left).
To salvage the silk I satin stitched around the edges, which added a nice bright pinky-purple like to the design. It still didn't save the silk from fraying so I also embroidered around the flowers in a blanket sitch. On the newer side I only hand stitched the silk so there is no satin stitching there. It is a bit duller. I haven't finished the hand embroidery yet.
Fronts on the dummy. I am not sure if the design is done here. I originally had more leaves and another flower on the lower left (shown right) side.Original sketch of design
I don't know- am I done or should I add more applique?

Friday, February 11, 2011

Making Another Jacket

This is the jacket front with the work changed up a bit.

Another photo. I have added the darker green to one leaf and the purple wool to both leaves. I satin stitched around the silk petals, but had to do a button hole stitch also. I did a chain and lazy daisy in green in the centre of the flower.
While I was on the phone I began the other side. It went a lot quicker and I was pleased with the results. That is, until I tried to lay them side by side. I have done two right fronts! So I guess I will be making two jackets.
When I tell my students that they cannot make a mistake I haven't already made, I am not kidding!

Thursday, February 10, 2011

Positive and Negative Applique and Why You Should Do a Sample First

Everything is a learning experience. I have been using a lot of boiled wool fabric lately and wanted to do something like this for a while. Indecision has postponed it for months. I decided to jump in without sampling. If worse came to worst I can recut one front panel, right? Boiled wool is cheap, right? Oh, yeah: it isn't. Lots of oops in this post.
Here is the design drawn onto a lightweight embroidery stabilizer. I placed it on the wrong side of the fabric with most the fabrics layered on top, then finally the boiled wool jacket piece. I should have layered in stages. The velvet frays a lot and not prettily, so I wanted in under the wool. The silk frays in an attractive manner, so I was fine with it on top. However, I needed to make sure that no velvet edges were seen at all, even under the leaf edges so I had to trim out the velvet after the outer edge of the flower was cut. Oops.
(This placing of the stabilizer on the wrong side was a tip from Claudine at Adventures in Couture, who has been doing a lot of reverse applique lately.)
The silk dupionni was laid on top of the work. I did not want any boiled wool on the flower. The stitching was done in a straight stich and free motion foot on my Mega Quilter.
Leaves were stitched in sections. The outer was stitched forst, then the wool trimmed away then the inner lines were stitched and trimmed.
Three types of leaves. Another oops. I don't really like the lower leaves without the wool on them. Why didn't I do a sample again?
Also, there should be two rows of stitching around the slik. It is trimmed too closely for the silk not to fray away.
I think this piece is salavage-able. I will try to add some wool to the lower leaves and do something extra around the silk. I had planned to add some hand work anyway. We shall see.

Monday, January 3, 2011

applique pictures

My friend and neighbour has a business where she electronically puts children's artwork onto various products like shoe and tote bags, aprons, etc.
She has made a few mistakes over the years and to salvage some of the product she asked me to make up some appliques and sew them over the previous artwork. Here are some of the pictures I did.
She didn't like these flowers so I did the garden ones below. They were more to her liking and went onto some tote bags.

Foxes and elephants. These went onto shoe bags. Hard to sew!

Frogs and Elephants.

I still have the frogs. She didn't like the textured fabric on the froggy bodies. Oh, well.
I used various fabrics for these. No purchase was made to salvage the waste! Some of the stitching was free motion straight stitch and some was satin stitch. I still have the floral on purple and the frogs so I need to think of something to do with them. Suggestions welcome!