Tuesday, December 22, 2009

WHOOO doesn't love an Owl (Hat)?


I have been making these felted wool knit hats for a local boutique. Here is Maisie modelling one of them for me.
I purchased the knit at a great price and felted (or fulled) it in the washer/dryer.
The applique is in a wool felt and they are lined in polartec. The ears, braids and tassels are in a doubly fulled batch of the knit. Less stretch to it, but less chance of it pulling apart.

Friday, December 18, 2009

Teal Jacket, post 2

I am not liking this.
I have it all stitched and seams pressed. I was looking large in this so I put the side darts in. Still looked large, so I have made the darts even larger. Still not in love with it.
I am going to go the collar or edge trim and go back to the fitting. I don't want to overfit it. I have the sleeves cut and stitched, but not pressed. If I need to take it in any more I might need to change them so they have to wait as well.
The collar pieces are separate from the main body, unlike most shawl collars and they enormous! I will not be cutting them from the correct fabric yet. I want to muslin this separately to see what I will do.

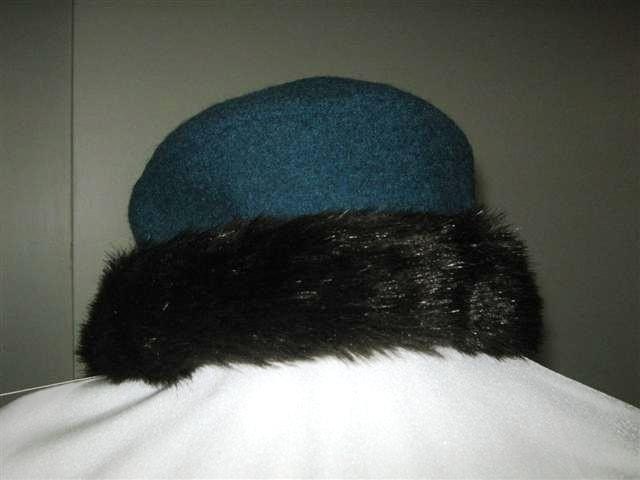
On a more pleasant note: Maisie made me laugh today. She found a piece of black fur in the studio, picked it up and started calling "Blackie? Blackie?" as if it would answer her. Blackie is one of the cat's names. As much as I pretend not to like the cats I would never turn them into fabric!

Wednesday, December 16, 2009

Another teal jacket

I am working on a version of this jacket-Vogue 1147. I started it mainly because I needed some of the leftover fabric to make a custom ordered hat, like this one, but smaller.
The teal is a boiled wool/rayon blend. I want it to be like a sweater, so I am not sure if I will line it. I may not even add the collar on this one. If possible I would like to develop this into a TNT pattern and make several different versions of it.
In order to cut it out, I first needed to make a muslin. The measurements of the finished garment on the pattern envelope looked close, so I cut out a size F in a wool that I found too scratchy to use. The only alteration was that I shortened the length above the waist by an inch. It fit around at first, but wasn't flattering. I really looked like I had a barrel body.
The back is cut for a lot of curve to it. As a pear shape, I don't have as much bulk above the waist as below and not as much curve to my back apparently.
I pinned out the amount I thought it needed removed from the back and tried it on again. There still seemed to be a lot of excess under my arms and through the waist. As a plus size I am always glad to have something go around, but this as just too big through the waist. The bust was good, although not defined. The back did not dip into my sway. Both aspects are fine. I want a looser style, but still shaped somewhat to my curves. The pattern has a one piece side front and side back and I thought I would like the A-line shape in there. I played with all fitting seams, then finally added a dart where the side seam would be. It extends from just below the armhole, getting deeper toward the waist, then tapering out to the hemline again. This forms a more fitted sillhouette, but is not tight in any way.
At this point I have the teal cut out and the dart marked. I am going to leave it unsewn until the rest is together and have a look at what is needed in the actual fabric. It might be fine without it since every fabric acts differently.

Tuesday, December 15, 2009

Trying to show comparison


I took these before I finished the last few. All are embroidered and now I need to decide if I will be adding any more at top or bottom. I might just add a trim to the bottom edge and get it done.
Hmmm, there is that attitude coming through again!

Sunday, December 13, 2009

Christmas Tree Skirt

I designed this tree skirt last summer and put it aside since I had so many other things to work on. Then, of course, I was in a rush and just wanted to get it done when I finally had time to work on it. However, I have learned my lesson in this area before. I did my basic satin stitching around the applique design of holly and ribbon, then let it ferment for a while while I thought about it.
Here is the basic stitching. The "ribbon" is in a deep red velvet, although it looks much darker in the photos
Two sections out of six showing how they will line up.

This is what I added after waiting a while. On the right there is a lime-ish green added to the top edges of the holly and the brown stem joining the brances. I am not sure if the pictures capture it, but it makes a big difference in real life.
This is the basic layout with all six sections. You can see that I haven't completed all the secondary stitching on all sections yet.
I will be adding rhinestones in red to form the berries. I just hope it gets done in time for Christmas.

Wednesday, November 25, 2009

Finished the Oireachtas season

Well, the last custom dress was shipped yesterday and arrived in Pennsylvania today. I did not hear from the clients, so either it fits and they were off to the "O"or it doesn't and they were rushing for alterations. I am sure you can imagine which I would prefer.
Today, while th eadrenaline was still flowing, I made a dozen Christmas stockings and completed a tree skirt for a local gift shop. I always have lots of velvets and sparkly laces left over from the dresses. This year I was determined to finally put them to good use. They turned out really cute. No photos though.
Next up are more items for the next show on December 5th. Tomorrow-hats and cleaning up the studio.

Sunday, November 1, 2009

Another dress completed

This dress turned out very pretty. I cannot take much design credit as the mom and dancer drew it up and picked out many of the fabrics. I had to make a few changes so it would be workable, but they did most of it. The first pic is in incadescent lighting and shows the colours better.
The flowers on the skirt are digitised. I had a few left over so I made brooches from them. You can see one on the cape in back. For the peplum I embroidered the flowers out on a metallic silk. The base is white velvet over a layer of cotton fused satin. The flowers were cut out, then satin stitched down on the velvet. The peplum was then backed with satin and edged in a silver satin stitch. The silver is very subtle in the dress. I don't love it but the dance mom does and that is what counts.
I think the curly ruffle is cute. This is the first time I used straight grain fabric instead of bias for that type of ruffle. I did a three thread rolled hem edge over 30 fishing line using embroidery thread in the looper for a bit of sheen. There are three ruffles in a very sheer white organza, so I treated them as one to make them more opaque. I gathered them together, first using the pleating/gathering foot, then by using a thread to pull them in more. It worked just as well as, if not better than the bias type. I will use this technique again.

Saturday, October 31, 2009

Satin Stitch lattice

I photograph a lot of my sewing to document the inner construction. I have recently emptied the camera so I am posting various techniques of the most recent Regionals season. For this embroidery I consulted the talented Summerset. She uses a lot of lattice in her wearable art pieces so I asked for some advice, which she graciously provided.

Lattice satin stitch all-over embroidery
The pattern is on left. On the right is a tracing on reverse on right. Again I have used a satin fused with cotton interfacing for the base, with the upper fabric in a cotton velvet. The darts are marked on the bodice and thread traced through all layers.
I sewed on the pink applique at neckline to have an end point for the embroidery. Sometimes you end up with a gap otherwise. The straight stitching lines follow the grid. This stablizes the layers and shows where to stitch.
Keeping the line straight to do the stitching was a challenge for me. I wanted to stitch at an angle. I also found it better to stitch over the straight line with the line being just covered at one side by the stitching. If I tried to centre it I got crooked.
I did not go through the dart area because I wanted to do as much as possible in the flat. I left one square blank on the side of the dart and then finished the stitching once the darts were sewn.
The stitching in flat nearly completed. I kept missing areas and would have to go back to them.
The darts are sewn, the fused satin was trimmed away and the dart was catchstitched open.
Dart is sewn and the gap in embroideryshows. It looks like my lines match up-Yay!
Stitching complete, but the bodice hasn't been trimmed to size yet. This dress is still in production, so I will get some pictures up once it has been completed.

Thursday, October 29, 2009

Reverse applique tutorial

Sometimes it is easier to do large chunks of applique in reverse. The fabrics cut slightly larger than needed and are laid down on the top. They are then straight stitched from behind and trimmed to shape. The technique works especially well with blocky shapes. Finer shapes require more finicky cutting.

Here is the pattern on the left. On the right is the design drawn onto the back of a piece of interfaced satin. I use this as a base for the applique. I have used a soft yellow to enhance the warm undertone tone of the white used in applique.

Pieces of fabrics are laid on top and stitched from behind following the design drawn onto the under fabric. Depending on the fabric, I will often use a spray adhesive to hold the fabrics in place. The gold sequin is called "mirror sequin fishscale". The sequins actually overlap like the scales of a fish. It is a pain to work with, but is spectacular under stage lights. I always wear safety glasses when using this fabric.

I used a co-ordinating teal velvet and metallic silk with the coral and gold, all laid on top, stitched from behind then trimmed away. This way you do not get texture show-though onto the uppermost fabric.

The white design was done in positve applique. The design was drawn onto a stiff interfacing, cut and spray glued into place. I basted it down before satin stitching the entire design in a fairly robust satin stitch. The finer design lines dictated a different technique. Doesn't the stitching make a huge difference?

The dancer wanted lace sleeves. This Guipure lace is heavy, so I added it after the rest of the work was done. The teal fabric under the lace also forms the upper teal applique.

The final product. In case you are wondering, that really is a solid block of rhinestones in five sizes and two colours glued down the centre front of the bodice.

Wednesday, October 7, 2009

Silk Scarf


I had a layer of water soluble embroidery stabilizer that was starting to dry out so I thought I would use it to make some scarves. This one is orange/fuschia shot silk cut into rectangles and laid out in a brick pattern with some big spaces. I stitched it vertically and horizontally using a mixture of sewing thread colours. It seemed a bit plain so I couched some yarns down on top.
The spaces I mentioned are important. The one I did previously did not have them and looks stiff and heavy. Notice that I have no photos of that one. I lightly sprayed some 505 Fabric Adhesive on the length of water-sol and placed the silk on it, then layered another piece of the water-sol on top. I didn't want to use too much spray in case it marked the silk. For the first few lengths of stitching I had to be very careful because the top layer was loose, but it was OK after that. I might spray glue the water-sol on both sides if I try it again, but it wasn't easy to wash out and I need to give the scarf another soak/wash to get the rest out.
The fabric really seems to shrivel up with the stitching. The scarf is much shorter than I had anticipated.

Monday, September 28, 2009

Fabric Score

While picking up some basic bridal satin at my local Fabricland store I saw some fabrics that looked nice. Fabricland is not known for its "nice" fabrics, so I had to check it out. An entire table was labelled as Pink Tartan overstock. Pink Tartan is a Mimram enterprise- the people who brought Club Monaco and Joe Fresh into existence. It looked, felt and smelled like wool and was only $9/m so I purchased 2.5m.
Once it was home, I snipped off a bit and did a burn test. It had difficulty catching fire, smouldered and went out quickly and left a soft ash, no bead. Sounds like wool to me!
On the other hand, a purchase made from a well known US mail order fabric store of 100% Merino knit brought me a synthetic blend. I will still use it, but am disappointed in that one.

Monday, September 21, 2009

Pleated clutch bags

I purchased some leather from FabricMart Fabrics recently and needed to make some bags from it. It wasn't a large skin so I could only get one bag and some trim from it.
I used Vogue 8527 view C for the first (the leopard one), then modified it for the all leather one.
I couldn't fuse the leather or the laminated dots got really dull, so I used 505 spray glue to attach hair canvas to back the leather. I cut it to size, then trimmed out the seam allowances after it was sewn.
The leather bag closes with a magnetic snap.
The leather bag is a basic clutch, while the leopard bag has a zipper and strap. I used a leopard rhinestone to trim the leather and made a leather tassel for the zipper pull.
The pattern went together really easily. I wouldn't hesitate to use the pattern again.

Wednesday, September 16, 2009

A Morning off work

I took the morning off and brought Maisie to the Children's Museum today. She had the most fun in the first room we entered. There was a stage, lots of musical instruments and some costumes. We had "tea" in two other areas.
Maisie as a dragon


Funky Red Riding Hood


Searching for eggs to bring as goodies for Grandmother.
The ottoman in our living room has three babies perpetually sleeping on it.

Friday, September 11, 2009

What makes an artist?

I attended a seminar yesterdayabout applying for a grant from the Art Council of Ontario for their "Artists in Eduaction" project. I found myself hesitant to say what I do, afraid they might tell me I don't belong.

Is it art?
Is it craft?
Is it something unrelated? Engineering, perhaps? Some form of technology?

When you ask my kids what their Mum does, my son replies "She sews" and my daughter says "Make dresses." I do do both of those things.

I also measure bodies, pattern make, draft, drape, fit.
I analyse body shapes to determine the most flattering lines, while trying to keep up with the ever changing whims of fashion.
I make designs for the structure of the garment, then change it depending on body shape, style of movement and need of the individual it is commisioned for.
I create artwork that is applied to the garments, then apply it, embellish it, analyze it for line, balance, flow, change it again.

Does this make me an artist? A technician, a craftsman? All three?

It isn't straight forward art, pure and simple. It is too practical for that. I have heard description of art as something with no practical purpose and craft as something useful.
A friend claimed that art does not need to be well made, but craft does.
Anyone have an opinion on this topic? Please feel free to share. I would love to know what others think.

Monday, September 7, 2009

2nd attempt


Some very soft and girly colour choices. These are much closer in value so shouldn't be as distracting. The girls/dolls/princesses will be holding hands like the kind you fold and cut out, but in different dresses.
The multi coloured floral stripe will not be in the quilt, but might become a Roman blind, so I would like the colours to coordinate. The pale pink paint swatch is on the fabrics in the first and third photos.
Maisie really doesn't want to move, so she is being bribed with a new bedroom where she gets to help with the choices. She is a bit of a tomboy, so I am surprised at the direction this is taking. Ballet lessons and peer pressure from the other girls at daycare are having an effect.