.jpg)
.jpg)
.jpg)
.jpg)
.jpg)

 to this,
 and eventually to this.


 I am mainly a garment sewer so I thought I would combine the two things. I free handed the vine and flower design then added a bead in teh centre of each flower. I thought it would be for me and I wanted subtle, but I don't wear a lot of beige or cream in the summer. Oops. Maybe I will try and black and white one. It might be easier if I do it before the hat is halfway constructed like these ones were.
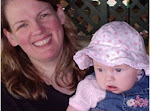
 This one has leaves that I made by cutting then singing the edges. I stitched them on a half completed hat and added a flower pin I had made. Voila! a perfect summer sunhat that can match any outfit. Maisie loves it!
 I did a bit more on trees and stuck it in a frame (loosely) for this pic. I might paint the sky a pale gray blue instead of white but am holding off to ruminate a while.
  These are some hatforms I drew in free motion. I did about 7 of them but only a few are shown here. I have been painting them, then embroidering and embellishing them some more. Here are two in progress. The flesh was painted first, then the hat, then background. On the red hat the blue leaked onto the flesh. I had to run with it. I added a bit more flesh tone on her nose, but left the blue everywhere else.
 Some more stitching and painting. I stitched in one leave on the side and tried to stamp two more but did not like the effect.
 So I appliqued some silk leaves over top and added copper foil to them. I then added some gold and copper foils to the swirls on the left. I might add more. Taking a break on it for now.

 The trees are about 9x9" and aren't quite done yet. I roughly stitched in the scene, then loosely painted in the bushes, leaves and ground. The bushes and leaves were done with a technique using tiny snippets of silk held down with tulle. The foreground was stitched back and forth with shades of green. It wasn't until I added some deep green into the front that the depth was really created.
 This one has more applique. I drew the design on the top and stithched it. I planned to use the reverse side as the right side but decided I wanted to elephant to face right, so I had to add the silk, stitch from the back and cut away the rest once it was all stitched. I am still playing with it. It probably should have been done with black bobbin thread as the white really shows. I want to paint the background and add more stitching and maybe some gold leaf.

.jpg)
.jpg)
.jpg)
.jpg)
.jpg)
.jpg)
.jpg)
.jpg)
.jpg)
.jpg)
.jpg)
.jpg)
.jpg)
.jpg)
.jpg)
.jpg)
.jpg)
.jpg)
.jpg) Here is the basic stitching. The "ribbon" is in a deep red velvet, although it looks much darker in the photos
Here is the basic stitching. The "ribbon" is in a deep red velvet, although it looks much darker in the photos.jpg) Two sections out of six showing how they will line up.
Two sections out of six showing how they will line up..jpg)
.jpg) This is the basic layout with all six sections. You can see that I haven't completed all the secondary stitching on all sections yet.
This is the basic layout with all six sections. You can see that I haven't completed all the secondary stitching on all sections yet.