Sunday, May 19, 2013

More leafing

Leaves after using heat tool. I used a Clover Mini Iron with various attachments for it as well as some from my wood burning tool. They were a bit trickier because they were thinner and shorter than the Mini Iron was made to take.


This is the backside of one leaf showing the organza and the wire between the layers. I need to learn to place the wire more accurately and follow it in the tooling. This one isn't too bad but another one is quite messy.


 Three leaves. I like the other colours within these examples. I thought they looked like mistakes at first but prefer them now.

This picture shows the leaves with the sharp line done on top. I used a pointy tip and drew the lines, then turned them over and used a rounder tip to push up the sections between the lines. on the variegated leaves I added the smaller veins first. On the more olive leaves I did the main vein and added the smaller ones after the rounder tooling.
These have had the rounder tip used. On the two shown here I did the main vein then the round tip then went back to the upper side and added more veins.  
Five completed leaves!

Thursday, May 16, 2013

Leaves


I am finished the Millinery course I have been taking at George Brown College in Toronto.  I had to travel there and stayed with a friend. Usually I went on the Sunday evening and returned on Tuesday late afternoon so it took a large amount of time for one three hour class. I stayed with a friend. I could have taken the Monday train but had I missed it I would have missed the class so I went early.
Now that it is over I had some extra time on my hands. It has been so hectic trying to work, look after the kids (who styed with their father while I was gone) that my place was a mess. After some major cleaning and tidy-ing I allowed myself some creative me time and decided to indulge in something I have wanted to do for years.
I have long been fascinated with millinery trimmings so I decided to try to make some leaves and flowers based on information from books and the internet. I combined several methods in doing these which I will post later. I have some cleaning up to do before I can find my books right now.
I started with some silk I had on hand. It is a silk satin with a tendency to curl to the wrong side. It took both dye and paint beautifully. I used Folk Art Fabric and Setacolor paints as well as Colorhue dyes to get the effect I wanted. The silk was underpainted with the paints but I painted with the dyes overtop to get it a bit deeper. I would have thought the opposite would be the way. Live and Learn.
I heat set the paints before I used the dye. You can see the paint as the lighter tone of green and blotch red in the upper part of the image.
Some of the leaves were cut with the satin side up and some with the matte side. The painting was done on both sides depending on which side I intended to use to the lines aren't as noticeable as the lower left leaf suggests. 

After the dyes dried, I cut the leaf shape on the bias and used a fabric glue to glue them to a piece of orgaza I had dyed previously with a piece of florist's wire in between. This technique comes from here: http://presentperfectcreations.blogspot.co.uk/2013/04/a-mini-tutorial-on-how-to-make.html . Previous to this I had been using silks that I fused together with fusible web. I have pictures of those as well that I will share.

I like the way they look already. The blotchy bits are my favourite parts. Next comes shaping with a heat tool.

Wednesday, March 27, 2013

Dragon Scales Applique

I seem to have issues posting on Blogger which make me not want to write. The Dragon Scales have been done for a while but my frustration has prevented me from completing this. I am going to try writing in one post and pictures in another.

I turned and laid out the appliques, arranging them in a "controlled random" fashion. Some of the lighter ones were semi transparent so I cut and inserted cotton broadcloth into an interlining for those pieces.

Dragon Scales Part 2


I laid them out to have a look before turning.

Thursday, March 7, 2013

Scallops- aka Dragon Scales


While at a quilt shop recently, I was inspired by an Oakshott cotton charm pack. I decided to create a scalloped design and am making it into a pillow. I created a design using as much of the square as I could and used interfacing as a facing for the scallops.
The interfacing was sewn with the fusible side to the right side of the fabric and stitched with a 1/4" seam allowance. I was able to get two scallops from each square.
They needed to be notched and turned and soon I had a pile of little scallops. I laid them out on a square and discovered that I need more so will need to dig into my stash. I had bought a set of fat quarters in the Oakshott last year so will finally use some of them. Most of the Oakshott fabrics are shot cottons, where the warp and weft are different colours. This gives them a depth and richness. They are very lively appearance compared to regular solids.


Wednesday, January 23, 2013

Winter 6 pac- first 3 pieces


Camisole in black stretch lace with nylon/lycra blend bottom. I did not use a pattern for this: I just winged it.
First I cut the cups after holding the lace over my bust to get an idea of the size needed. I sewed the cups and added straps, then added a parallelogram of fabric for front and back loosely based on a t-shirt. I finished the upper back edge with stretch lace.
When I tried it on without a bra, the girls falling below the bottom of the cups so I added more stretch lace on the inside front below the bust. Then they were staying up, but fell out at the sides so I added a strip of power mesh to the back, above the existing stretch lace and finished with lingerie elastic at the top.  I don't think I could recreate it exactly, but I do like it enough to try. It is warm under my clothes and the deep V shows less under a top than some of my purchased camisole tops.

I also made the panties. Hate to say it but I am much bigger than this dummy and things are much snugger on me.

The robe is made from a limp nylon mesh. It is very comfortable. It has a raised neckline and a front drape but the limpness really makes these hard to see. The edges have a rolled hem finish done on my serger. I used stretch elastic at the waist and a bias strip of silk that was hanging around for a tie at the waist. There is not much of a crossover so the front drape is handy for modesty. I don't usually wear it over the cami and panties like this so the general effect is not sexy. My apartment has radiators with no turn off valves and the robe works well however hot it is here.


Sunday, October 14, 2012

Framed


I have finally done something with these pieces. They are framed now, but maybenot quite done. I stretched silk chiffon with stitched on sequins over canvases and then stitched the flower embroideries in place. The sequins catch the light and sparkle through the openings in the lace. It is a pretty effect. I have to stop myself from adding rhinestones though. The Irish dance dressmaker in me can be hard to quell. I think I will add some beads though.
A friend made the frames for me.

Wednesday, August 15, 2012

Lace Making

Irish lace is made from free standing motifs that are basted to a base and joined with more crochet stitches. After thinking about this construction method for a while, I decided to try to do this with fabric.
I combined the free lace technique with applique to make these samples.


These are the pieces laid out on the sticky water soluble film. I did two samples. The first picture shows sample 1uncovered and the second shows sample 2 topped with a non sticky water sol film. I didn't leave a lot of space between motifs. The fabrics are all silk. Some are duppioni and others are organza in shades of dull purples and gray. The green is a shot organza in purple and green that doesn't read as green in person.


Sample 1 after stitching. I did the stitching very dense-ly using a polyester embroidery thread in a purplish gray. I made sure all the motifs were stitched first them added joining stitches.


Sample 1 held up to the light.


Sample 1 after rinsing and pressing. I thought it looked too dense so I stitched sample 2 with less joining stitches. When I rinsed sample 2 it seemed ready to fall apart. I was very disappointed. I left pressing it til morning as the light isn't sufficient for me at night.
Sample 2 after pressing.
Sample 1 on left and 2 on right. I like them both. Now to decide what to do with them. I am thinking of framing them or maybe using them like the fringe on a scarf. Opinions welcome!
I really dislike this new blogger layout. I don't know how anything is going to look.

Thursday, June 28, 2012

More Peacocks


These ones are in cotton rather than silk. I really like making the peacocks. I enjoy the free motion feathers. The satin stitching is a bit wonky and hurts me to do. I spent yesterday stitching one and still haven't recovered yet.

Wednesday, June 27, 2012

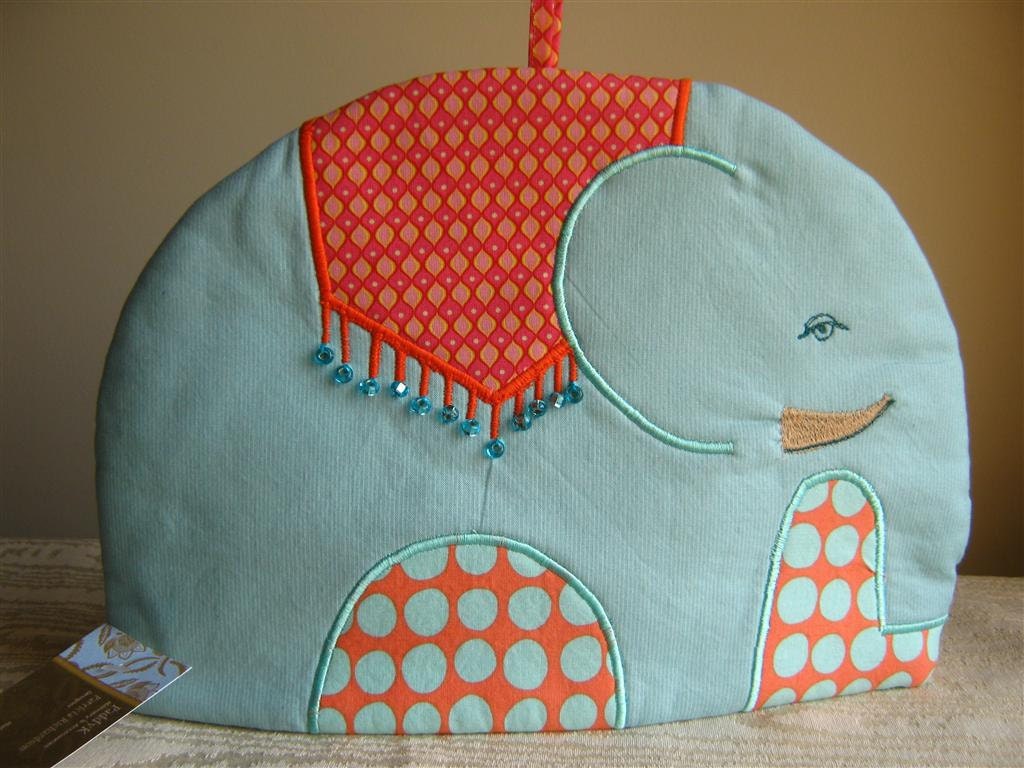
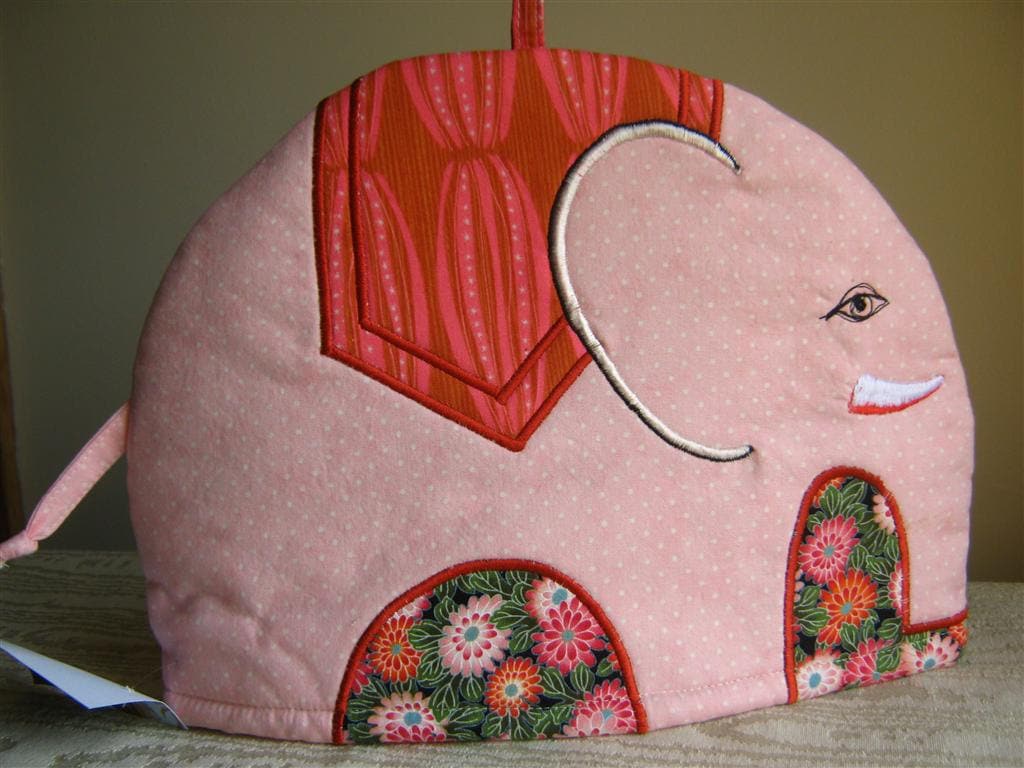
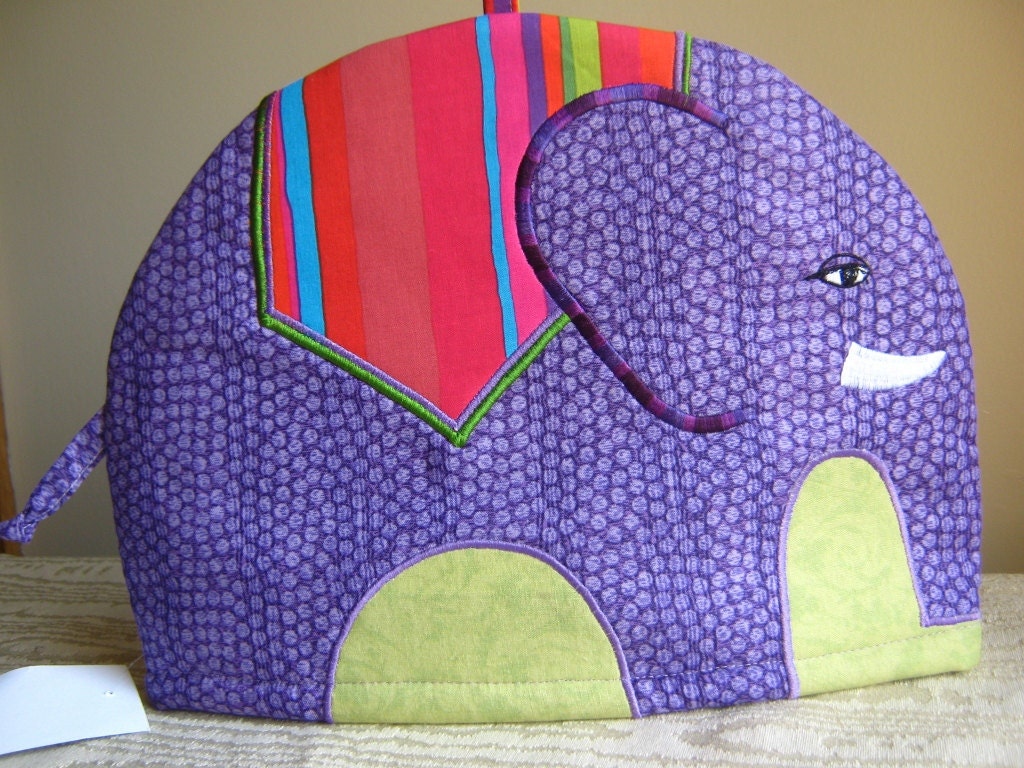
Elephant Tea Cosies

Before my series of surgeries last year I had injured my back. I am cancer free (so far, fingers crossed) but the back issue remains. It has made sewing a challenge. I have some bulging discs that are affected by sitting, especially sitting and leaning forward.
I am trying to teach myself to sew while standing, but my control is not great yet. In order to practise I have been doing a lot of free motion while standing. Mistakes are less apparent in a sketchy style. However, I am accustomed to the heavy satin stitching of the dance costumes I have made for so many years.
These tea cosies have been great practise for re-learning to sew. These ones feature some of the satin stitching while the peacocks have far more free motion.